Ripping up that tired old carpet can feel like a breath of fresh air, but laying oak flooring yourself might seem daunting. Fear not, because transforming your UK home with beautiful oak floors is easier than you think. We’ll guide you through every step, making sure you have the confidence and know-how to tackle this rewarding project. By the end, you’ll have a stunning floor that not only looks great but also boosts your home’s value. Let’s get started! For more detailed information on installation techniques, you might find this guide from Wood Floor Warehouse helpful.
Preparing Your Space
Before you start laying your oak flooring, it’s crucial to properly prepare your space. This involves clearing the room and gathering all the necessary tools. Let’s break down these steps to ensure you’re ready for a smooth installation process.
Clearing the Room
Clearing the room is the first step in preparing for your new oak flooring. It’s essential to create a clean, empty space to work in.
Start by removing all furniture from the room. If you have large pieces that are difficult to move, consider asking friends or family for help. Next, take down any curtains or blinds that might get in the way.
Remove the existing flooring, whether it’s carpet, tiles, or old wood. Be sure to wear protective gear like gloves and a dust mask during this process. Once the old flooring is gone, give the room a thorough clean to remove any dust or debris.
Finally, check the subfloor for any damage or unevenness. Repair any issues before proceeding with the installation. For more tips on preparing your space, check out this helpful article from Mr Sander.
Gathering Necessary Tools
Having the right tools at hand is crucial for a successful oak flooring installation. Make sure you have everything you need before you begin.
Essential tools include a tape measure, pencil, chalk line, and a spirit level for accurate measurements and marking. You’ll also need a saw for cutting the boards to size – a circular saw or hand saw will do the job.
For the installation itself, you’ll need a hammer, flooring nailer, and pry bar. Don’t forget safety equipment like knee pads, safety goggles, and work gloves.
Lastly, gather materials like underlay, moisture barrier, and wood filler. Having all these tools and materials ready will make the installation process smoother and more efficient.
Choosing the Right Oak Flooring
Selecting the perfect oak flooring for your home is a crucial step in the process. It’s not just about aesthetics; the quality of the oak and the type of finish you choose will affect the durability and maintenance of your floor.
Selecting Quality Oak
Choosing high-quality oak flooring is essential for a long-lasting and beautiful result. Look for boards with few knots and a consistent grain pattern.
The grade of the oak is important. Prime grade oak has few knots and a uniform colour, while rustic grade has more character with knots and colour variations. Consider which style suits your home best.
Check the moisture content of the wood. It should be between 6% and 8% for optimal stability. Also, look at the thickness of the boards. Thicker boards (18-20mm) are more durable and can be sanded more times over their lifespan.
For more information on selecting quality oak flooring, you might find this guide from Teka Flooring helpful.
Understanding Different Finishes
The finish of your oak flooring can dramatically affect its appearance and maintenance requirements. There are several options to consider.
Oiled finishes penetrate the wood, enhancing its natural beauty. They’re easy to touch up but require more frequent maintenance. Lacquered finishes create a hard-wearing layer on top of the wood. They’re more resistant to spills but can be trickier to repair.
Brushed and stained finishes can add texture and colour to your floor. These can help hide scratches and give your floor a unique look.
Consider factors like foot traffic, sunlight exposure, and your personal maintenance preferences when choosing a finish. Remember, the right finish can make your oak floor easier to care for in the long run.
Laying the Oak Flooring
Now that you’ve prepared your space and chosen your oak flooring, it’s time for the main event: laying the floor. This process involves preparing the subfloor and then carefully installing the oak boards.
Preparing the Subfloor
A well-prepared subfloor is crucial for a stable and long-lasting oak floor. Start by thoroughly cleaning the subfloor, removing any dirt or debris.
Check the subfloor for any unevenness using a spirit level. If you find any dips or bumps, use a levelling compound to create a smooth surface. This step is vital for preventing squeaks and ensuring your oak flooring lies flat.
Next, install a moisture barrier to protect your new flooring from any dampness rising from below. Over this, lay your chosen underlay. This will provide insulation and help reduce noise.
For more detailed guidance on subfloor preparation, this video tutorial provides some excellent visual tips.
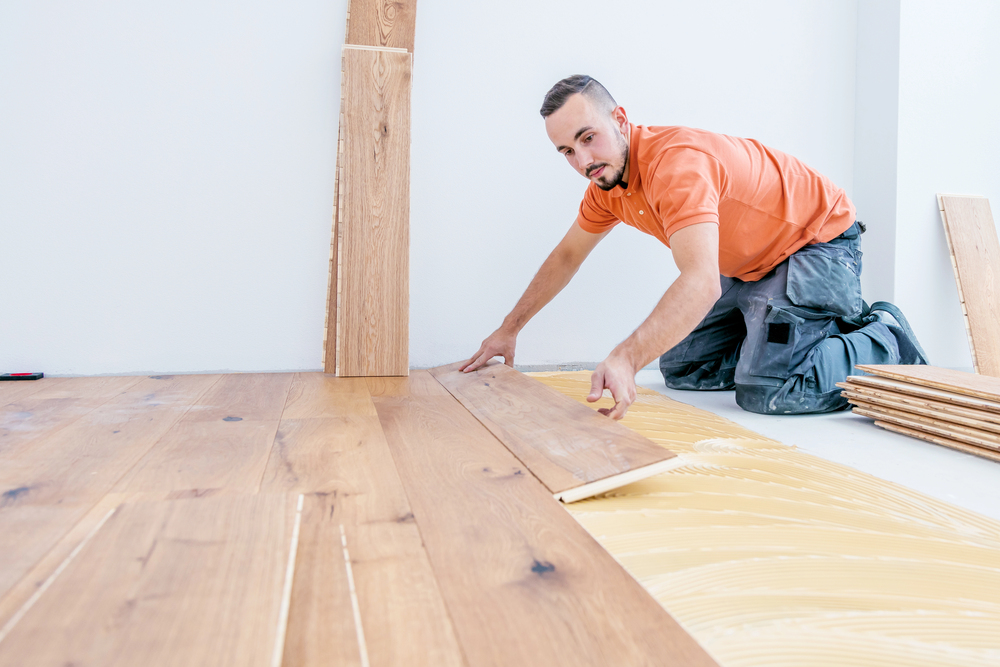
Step-by-Step Installation Process
Installing your oak flooring requires patience and attention to detail. Follow these steps for the best results:
- Start in a corner of the room, leaving a 10-15mm expansion gap around the edges.
- Lay the first row of boards, using spacers to maintain the expansion gap.
- Stagger the end joints of adjacent rows by at least 300mm for a natural look.
- Use a flooring nailer to secure each board, nailing through the tongue at a 45-degree angle.
- Continue laying rows, checking for straightness with a chalk line every few rows.
Remember to measure and cut boards as needed to fit around obstacles like doorways. Use wood filler to cover any nail holes or small gaps between boards.
For the last row, you may need to cut the boards lengthwise to fit. Use a pry bar to ease these final boards into place.
For a more comprehensive guide to installation, check out this detailed article from UK Flooring Direct.
Finishing Touches
After laying your oak flooring, it’s time to add those final touches that will protect your new floor and give it a polished look. This involves sealing and protecting the wood, as well as adding skirting boards for a neat finish.
Sealing and Protecting
Sealing your oak flooring is crucial for protecting it from moisture, stains, and wear. The process depends on the finish you’ve chosen for your floor.
For oiled floors, apply a thin layer of wood oil using a lint-free cloth. Work in small sections, following the grain of the wood. Allow each coat to dry fully before applying the next.
If you’ve opted for a lacquered finish, you may not need to apply additional sealant. However, you can add an extra layer of protection with a clear floor varnish.
Always test your chosen sealant on a small, inconspicuous area first to ensure you’re happy with the result. Remember, proper sealing will extend the life of your oak flooring and keep it looking beautiful for years to come.
Adding Skirting Boards
Skirting boards provide a neat finish to your new oak flooring and cover the expansion gap you left around the edges of the room.
Measure the perimeter of your room carefully, accounting for any corners or obstacles. Cut your skirting boards to size, using a mitre box to create neat corner joints.
Attach the skirting boards to the wall, not the floor, using a nail gun or adhesive. This allows the floor to expand and contract naturally. Fill any nail holes with wood filler that matches the colour of your skirting.
For a professional look, consider painting or staining your skirting boards before installation. This can add a nice contrast to your oak flooring or blend seamlessly for a cohesive look.
Maintenance and Care
Proper maintenance is key to keeping your new oak flooring looking beautiful for years to come. This involves regular cleaning and some long-term care practices to protect your investment.
Regular Cleaning Tips
Keeping your oak flooring clean doesn’t have to be a chore. Follow these simple tips for regular maintenance:
Sweep or vacuum your floor daily to remove dust and debris. Use a soft-bristled brush attachment to avoid scratching the wood.
For deeper cleaning, use a slightly damp mop. Avoid using too much water, as this can damage the wood. A microfibre mop is ideal for this task.
Clean up spills immediately to prevent staining. Use a soft, dry cloth to blot the spill rather than rubbing it.
Avoid using harsh chemical cleaners. Instead, opt for pH-neutral cleaning products specifically designed for wood floors.
Remember, prevention is better than cure. Use felt pads under furniture legs and place mats at entrances to reduce dirt and scratches.
Long-term Care Recommendations
To keep your oak flooring in top condition for the long term, consider these care recommendations:
Maintain a consistent indoor humidity level between 35% and 55%. Use a humidifier or dehumidifier if necessary to protect the wood from warping or cracking.
Refinish your floor every few years to restore its lustre. The frequency will depend on the amount of foot traffic and the type of finish you’ve used. Wood Floor Sanding Southampton
Avoid wearing high heels or shoes with hard soles on your oak floor, as these can cause dents and scratches.
Use rugs or mats in high-traffic areas to protect the floor from excessive wear. However, avoid rubber-backed mats as these can trap moisture.
By following these maintenance and care tips, you’ll ensure your beautiful oak flooring remains a stunning feature of your home for many years to come.

Leave a comment